March 10, 2016

Fire on the Mountain Tonic

I don't take flu shots... Some day I will write a post on why, but for today I just want to talk about what I do instead of introducing heavy metals,(Thimerosal/ethyl mercury) and live (although "weakened"), virus into my system. There are natural ways to make it through cold and flu season without succumbing to every bug that is being passed around the office and lurking on every shopping cart handle.

To start with, it is important to be diligent to thoroughly and frequently wash your hands when in public places. Keep your hands away from your face and your fingers out of your mouth. Use a non isoprophyl alcohol based hand sanitizer when you can't wash your hands. I use lemon essential oil that I keep in a key fob case with 7 other essential oils. I just drop a drop or two on my hands and rub them together front and back. Then I breathe deeply from the bottle to get the lemon vapors up into my nostrils. Lemon will kill many pesky germs on contact and is much safer to use than the alcohol based sanitizers. Be mindful that there are a lot of people who take no precautions when they are sick, don't cover their mouth with their forearm instead of their hands when they cough or sneeze, come to work with a fever, sneezing and coughing, go shopping and touch shopping carts with hands that they just sneezed into, eat out and use their germ infested hands to serve themselves from the salad bar or drink dispenser.... all while spreading the wealth of their illness with everyone who may come in contact with them or things that they have touched. So whenever possible, avoid public eating and other potential harvest fields of germs like public bathrooms. I know it isn't possible to avoid all public contact, especially if you work in a place that wants you to show up for work, sick or not... but taking precautions like hand washing and avoiding what contact you can with the public at large will cut your risks of infection down a lot.

 Besides exercising diligent germ fighting hygiene measures, there are some very effective proactive natural medicine routines that you can use to fight off illness. All of my family has their own bottle of Thieves, (Young Living, good but very pricey), or in our case 4x, (Secrets of Eden, it is the same thing as Thieves but a lot more affordable). We take it a couple times a day proactively, and use it more frequently if we are in public or feel like we are coming down with something. We have a infuser for our car that plugs into the cigarette lighter. We keep either 4x or lemon essential oils going in the car infuser so we are breathing it into our nostrils and into our lungs where it can kill bacteria that we may breathe in while in public. I also brush my teeth with it, using a drop or two on my tooth brush along with my home made toothpaste, or a drop or two in the water receptacle of my Waterpik. This kills germs as well as promotes good oral health. 

While practicing health hygiene and using essential oils to stave off infection is effective, we go one step further and our version of a flu shot... Fire tonic. This tonic is a powerful tool against flu virus' and bacterial infection. Unlike the
flu shot which is made in a lab using live virus or virus byproducts, and stabilized with heavy metals like ethyl mercury, Fire Tonic is made in your kitchen, using fresh, living. organic (where possible), ingredients. The flu shot  must be administered by a "medical professional", where you can take the Fire Tonic at home with no co pay. I will warn you that it takes some getting used to, but the benefits far outweigh its fiery personality. There are many recipes for tonic out there, but for the most part, the basic ingredients are the same, raw organic apple cider vinegar with mother, (from now on referred to as ACVM), horseradish, ginger, garlic and hot peppers. My recipe takes things a step further, to bring in some other germ fighting immune strengthening components. This tonic is taken daily, a shot glass full as soon as the tummy is ready for it. Once you get used to the fiery jolt, you will start to look forward to your daily "shot", and will enjoy the mood elevating, endorphin buzz you will get from it...

There are two basic ways to make this tonic, one is to put the fresh ingredients together in a blender, put the blended ingredients in a 1/2 gallon jar and let it steep in ACVM for several weeks. Then strain and press all the ingredients through cheesecloth, to derive the fiery liquid gold. The other way is to arrange the ingredients in a jar, add water and salt and let it ferment naturally for 4 weeks, then strain, press and bottle. Each has its own virtues, the ACVM has many health benefits, and the fermentation of the other adds much needed probiotic bacteria to the mix. Either one is effective against virus and bacterial infections. I have decided that for my family, it is best to make both. The vinegar based tonic stores for the long term, very well, the fermented tonic requires refrigeration, or if not refrigerated, to be used up in a week or two after full fermentation ceases, so when possible we use the fermented version daily and keep the vinegar version on hand for times when we don't have the fermented version available and for longer term storage.

In my recipes I use these basic tonic ingredients:

Horseradish- which is full of vitamin C and B complex, minerals, potassium, calcium, iron and enzymes. It prevents scurvy, is an expectorant, can treat tonsillitis, and is a natural treatment for rheumatoid arthritis, as well as many respiratory ailments. It can kill the bacteria that causes bronchitis, strengthens the heart, increases resistance to cancer, is a powerful antioxidant and detoxifies the liver to eliminate carcinogens.


Ginger- a natural blood thinner, reduces cholesterol, lowers fever, is sedative and antibacterial, anti-fungal, and settles the stomach and soothes intestinal distress. Contains gingerol a powerful anti-inflammatory and anti-oxidant. May reduce muscle pain and soreness. Lowers blood sugar levels and improves heart health. Improves brain function and may guard against brain degradation and dementia. Reduces menstrual pain. The substance called 6-gingerol aids in the prevention of some kinds of cancer, (pancreatic, colon, breast and ovarian cancer, testing and research continues).


Onion-A potent diuretic, it is antibiotic and anti-inflammatory, it is an effective expectorant, making it useful for use colds, flu and persistent coughs, Onions are rich in quercetin, which has been shown to prevent heart disease, by stopping cholesterol from attaching to arterial walls and prevents blood platelets from sticking together and forming clots.

Hot Peppers- contain capsicum which supports the immune system. It also acts as a natural decongestant and has warming properties that alleviate chills. It has anti- inflammatory and analgesic properties which make it a useful pain killer. Helps treat cancer, peptic ulcer, menopausal problems, lowers the risk of cardiovascular disease and diabetes. Relives the symptoms of fibromyalgia. Is good for the skin and treats psoriasis.


Raw Apple Cider Vinegar- is a natural antiseptic, anti-fungal, is great for digestion, detoxifying, lowers blood sugar levels. It can help with weight loss by promoting satiety and lowering glucose and insulin levels. Helps reduce blood pressure. Has been observed to reduce the size of cancerous tumors and can kill cancer cells. It can cut down on  nighttime leg cramps, (an indication of a potassium deficiency), When coupled with honey, apple cider vinegar helps relieve the symptoms of rheumatoid arthritis. Arthritis pain in part is caused by metabolic waste that is stored in the connective tissue, the pectin, acetic acid and mallic acid in ACVM absorbs toxins and helps to flush them from the body. It alkalinizes the body and clears out acid crystal build up in the joints. It is a great source of the nutrient potassium, which is often in low levels in RA patients.


And I add to the basic ingredients:

Turmeric root-  An effective anti-inflammatory. Low level inflammation is in large part responsible for almost all chronic illness, including heart disease, cancer, metabolic syndrome, Alzheimer's, and other degenerative and auto-immune conditions. Curcumin is the substance within turmeric root which has most of the medicinal properties. Curcumin reduces inflammation at the molecular level. It is an antioxidant, so it eliminates free radicals and stimulates the body to increase production it's own antioxidant enzymes. It improves brain function by boosting BDNF, the body's neurotrophic factor, thus improving brain function and lowering the risk of brain disease.The molecular changes caused by cucurmin prevent cancerous cells from forming, having an affect on active cancer as well as preventing the division of cancerous cells. Curcumin can cross the blood brain barrier, a rare attribute, and is able to interrupt the progression of Alzheimer's and help the brain to heal. Arthritis, in some cases is more effectively treated with curcumin than with pharmaceuticals. It has a profound affect on depression, actually proving more effective in clinical studies than Prozac for alleviating the symptoms of depression. It does this by boosting the BDNF levels and increasing the body's ability to produce it's own serotonin and dopamine. It is hard for the body to absorb turmeric, but with the addition of piperzine, a substance found in black pepper corns, the absorption rate can be improved by 2000%. so turmeric should always be used in combination with black pepper. Do not use if pregnant!! Can cause uterine contractions.

Lemon-Although lemon is acidic outside the body once it is in the digestive tract it becomes alkaline. So lemon is a good ph balancer for the blood. Lemon is high in vitamin C, increasing the immune system's ability to fight off infection. It increases the production of bile aiding in digestion efficiency and dissolves uric acid which causes joint pain and is a component of some kinds of kidney stones. It can aid increase the body's ability to burn fat. Helps to maintain eye health. Detoxifies kidneys and liver.

Rosemary-Is a powerful detoxifier and has a calming effect on the nervous system. Rosemary contains rosmarinic, a compound that improves blood circulation, increasing the flow of oxygen rich blood to the brain. This improves concentration, alertness and promotes relaxation. It is anti-microbial. Rosemary contains components that fortify the immune system. It stimulates the adrenals, providing more energy while it elevates mood and calms nerves. Inhibits the growth of bacteria like e. coli. Protects the lungs from irritation and inflammation from environmental toxins.

Black Pepper- It is useful in fighting the common cold, constipation, indigestion, anemia, impotency, muscular strains, dental disease, pyorrhea (a dental disease), diarrhea, and heart disease. It contains manganese, iron, potassium, vitamin-C, vitamin K, and dietary fiber. Black pepper is also a very good anti-inflammatory agent. It aids in digestion by increasing the production of hydrochloric acid in the stomach, will detox the body by promoting sweating and urination. The outer shell of the pepper corn breaks down fat cells so that they are more easily accessed by the body , thus aiding in natural weight loss. So be sure to use whole pepper corns, cracked with a blender or mortar and pestle, to gain all the benefits that black pepper has to offer. But most importantly, it is necessary to use turmeric and black pepper in combination so that the body can take up the health benefits of turmeric. Without using black pepper with turmeric most of the healing properties of the turmeric pass through the body without being absorbed.


All ingredients that can be organic should be... I know that it is hard to find some of these ingredients in organic.


Fire on the Mountain Tonic # One


(Fermented)

Ingredients


2 cups of habanero peppers, 
split, (for those who are able to take the heat), or 3 cups of jalapenos, cut into 1/4" rings. If using jalapenos, then omit the next ingredient in the list, they are added to this amount for a total of the required peppers.
1 cup fresh jalapeno, cut into 1/4" rings
6 whole bulbs of garlic, cut in half through the equator, reserve two halves to be kept intact break apart the rest and bruise/mash with the flat edge of a knife. (No need to peel the cloves)
12 inches of fresh horseradish root, Scrub with a brush but do not peel, cut into 1/2" cubes 
1 large hand of fresh ginger, or enough ginger root to equal 2 cups sliced ginger, washed and sliced into 1/4" thick slices. Do not peel.
1 cup sliced turmeric root, (10-12 rhizomes of fresh turmeric)
1/4 cup black peppercorns, bruised and cracked in a mortar and pestle or given a quick whirlin a bullet blender, you don't want it powdered just bruised and cracked.
1 large onion, root end and tip end cut off, loose skin removed, (leave the rest of the skin on), then cut into thin slices
2- 6" sprigs of rosemary
4  1/4" slices of lemon, (wash lemon well before slicing)
1/4 tsp. salt

1/2 capsule of probiotic acidophilis, (optional)
Purified water to fill jar

Equipment

Apron
Sharp knife
Mandolin with slicing blade, optional but makes things more uniform and goes faster
1 half gallon Mason jar

4 oz. mason jar
Plastic wide mouth Mason jar lid (can be found at Walmart in the canning section, or purchased on Amazon,com), or a piece of plastic wrap and a two part metal Mason jar lid, ( *Due the fact that metal that is not stainless steel can taint the fermentation process, it is necessary to use a plastic lid or put a piece of plastic wrap between the rim of the jar and the two part wide mouth mason jar lid.)
Glass craft beads to fill the 4 0z. jar Mortar and pestle or bullet-type blender
Plastic sandwich bag Nitrile or latex gloves
8"square pyrex dish or comparable sized plastic container with 1 inch sides
Strainer
Funnel
16x16" square of cheese cloth
Quart sized Mason Jar or two or glass bottle with tight fitting lid that will hold the volume of rendered liquid Wipeable,impermeable tablecloth

Instructions

Cover your work surface with wipeable tablecloth. Why? Well, the turmeric root will stain whatever it touches and it will not come out. Don the apron and make sure to put on your nitrile/latex gloves. If you have sensitive skin, double glove your hands.

Sterilize both 1/2 gallon and 4 oz.jar by pouring boiling water to the brim and leave sitting until cool enough to handle. Pour off water and dry jar with a fresh, clean towel. Lay the 1/2 gallon jar on its side and place lemon slices around the walls of jar on 3 sides, then take a couple of handfuls of horseradish cubes and place them in the jar to hold lemon slices to the sides. Set jar upright and place last slice on the forth wall of the jar. Place remaining horseradish in the jar. Then put in a layer of turmeric root, and then the onions. Place two halves of garlic bulbs, cut side out against the side of the jar on opposite walls of the jar, on the other two walls place the rosemary sprigs, then back fill with a layer of ginger, then jalapeno slices, and habaneros (if using), topping off with the layer of freshly cracked black pepper and the garlic. Press down on the veggie in the jar firmly.

Dissolve the salt in 2 cups of water, pour into the jar and then fill the jar the rest of the way with water to just cover the top of the veggies. The veggie and water level should come to just below where the neck of the jar begins to taper in some, (This will leave you room to put the smaller 4 oz. jar and glass weights in.)


Take the plastic sandwich bag and place it over the mouth of the 1/2 gallon mason jar, with fingers press down gently, arranging the plastic bag so that it is in contact with the entire surface of the vegetables.


 Take the 4 oz. jar filled with glass beads and place it in the mouth of the jar, on top of the plastic bag.


 Place 1/2 gallon jar in a casserole dish or in the sink then press down on the smaller jar, some liquid will flow out of the 1/2 gallon jar, (which is why it is in a casserole dish or in the sink). Take plastic lid that fits a wide mouth Mason Jar  and put it on the 1/2 gal. jar and screw down tight. If the lid won't go on, it may be necessary to take the 4 oz. jar out and press the veggies down harder to make room for the weight jar, (some fluid is sure to go over the edges so make sure the 1/2  gal. jar is on the plate or in the sink) , then replace the weight and screw plastic lid on firmly.  Invert the jar once or twice to dislodge air bubbles and look to make sure the veggies are completely submerged. If not, take the lid off, the weight jar and sandwich bag out and top off with a little water. replace, sandwich bag weight and lid, then invert again.

At this point, place the 1/2 gallon jar in a casserole dish or other plastic container to catch any liquid that might bubble out of the jar during the fermentation process and place out of the way, in a quiet corner of the kitchen counter. Invert at least twice a day for the first week, then once a day for the next 6 weeks. 


At the end of the fermentation pour off the liquid from the veggies into a bowl and place the veggies in the blender. Pulse until the veggies are well broken up, but not a puree.


 Pour the veggies and liquid back in the 1/2 gallon jar or into a bowl or other receptical that can hold it all if you are using the 1/2 jar as the storage container, and place a strainer lined with a layer of cheese cloth in the bowl that held the liquid previously. Stir the contents of the jar well and then slowly pour through cheese cloth, a little at a time. When the liquid level begins to approach the bottom of the strainer, stop and pour liquid off into the storage bottle. Continue to pour off and decant until the jar is empty.


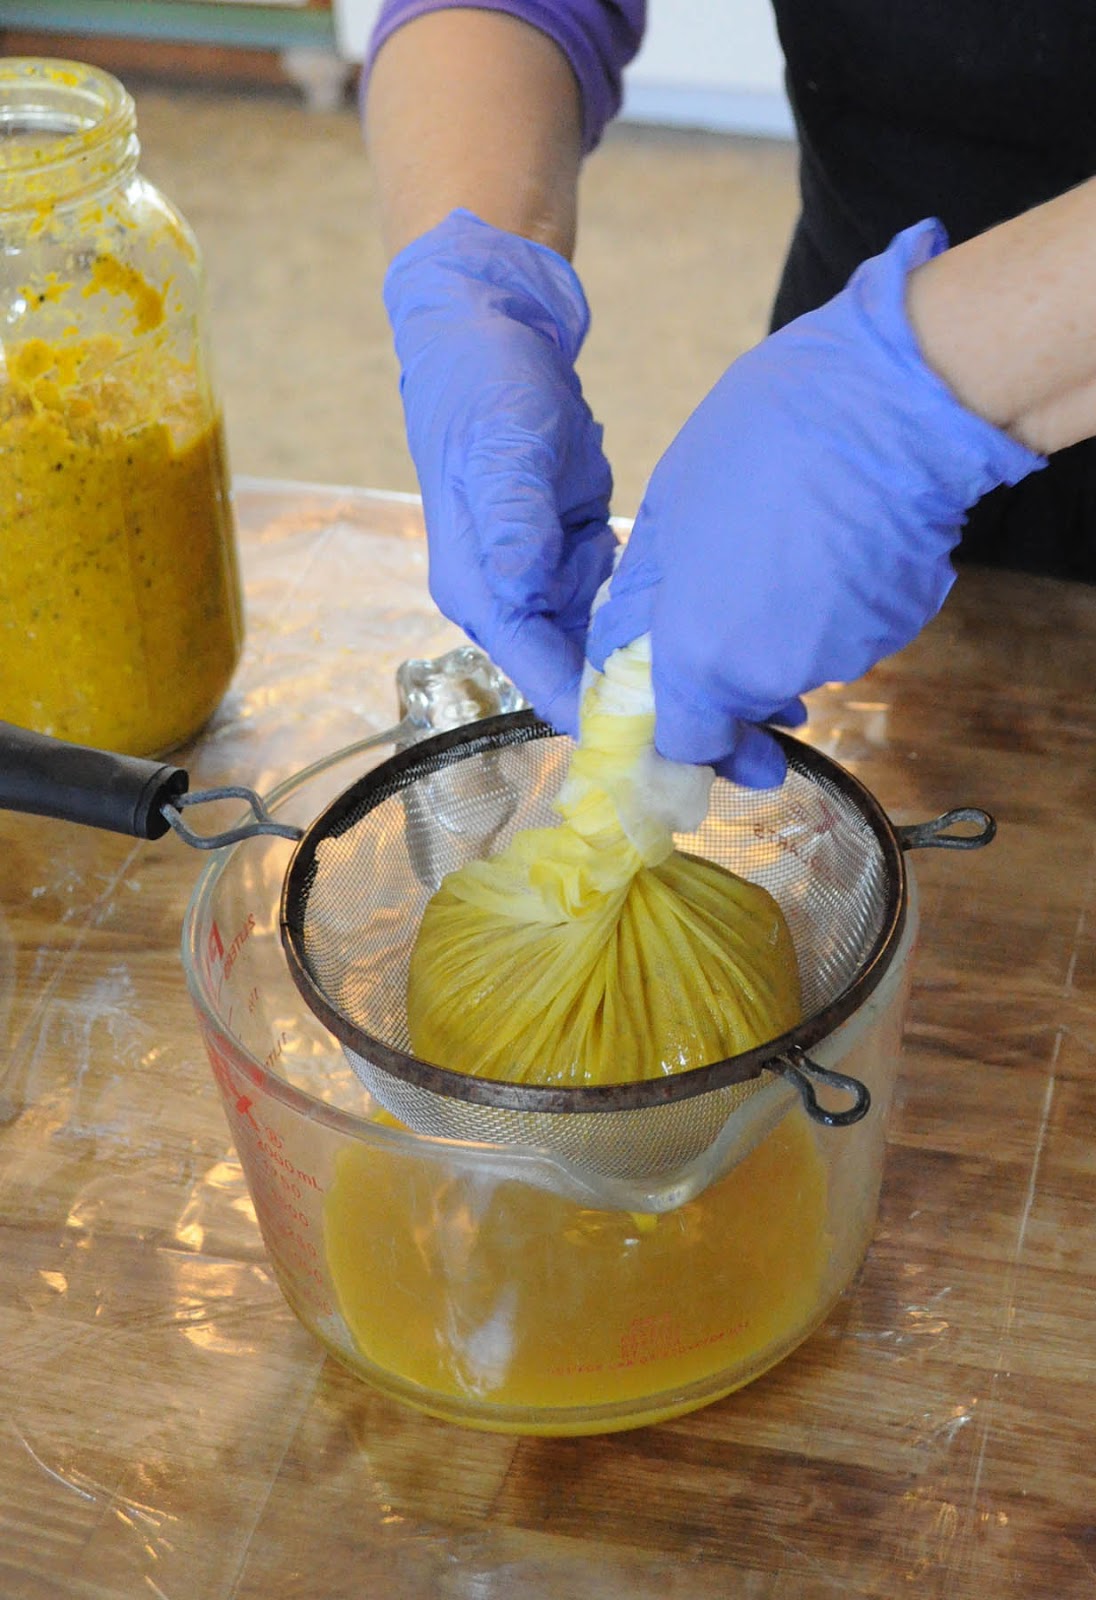
There will be solids left in the cheese cloth that still have liquid in them, so using a pair of latex gloves, (remember there are hot peppers in this mix and they will burn the skin on bare hands), gather up the corners of the cheese cloth and twist them together until they begin to apply pressure to the contents of of the cheese cloth, then gently twist and squeeze the  cheese cloth "bag" until no more liquid will drip out.


Deposit the contents of the cheesecloth into the compost container and set the cloth aside on a plate or in a bowl to be dealt with later.

Once all the liquid is squeezed out and in the storage container, cap it tightly and store in the refrigerator.

* Note about clean up...Carefully rinse the cheesecloth, being sure not to get the residue left in the cheese cloth on your skin, clothing or stainable surfaces. and then submerse in a pan of hot soapy water, leave to soak for a couple of hours and then with latex gloves,  hand wash cloth and hang dry. Reserve this cheese cloth for this particular process since the turmeric will permanently stain it and no matter how often you wash it, the pepper oils will linger in the cloth fibers.

 To use: 

Measure 1 - 1 1/2 ozs. in a shot glass,( a good place to start, but eventually you want to be up to 2 oz. per dose), and drink in 6 oz. of water, add a little honey if necessary to get it down, (or do what I do and just throw it back it one mouthful and swallow...not recommended for the uninitiated or faint of heart...), and oh yea... best taken on a full stomach.... This tonic will cure what ails you and will keep your immune system strong so that you don't catch every bug that is floating around out there. How does the old saying go...? "What doesn't kill you will make you stronger..." Really, I am not trying to scare you off... this stuff is great for your immune system and will strengthen you, protect and heal you from so many ailments it is worth the effort to make it and acquire a tolerance to it's fiery nature, but you will need to take it slow and build up to the recommended dose. Drink it mixed with as much water as necessary to make it comfortable for you, but you want to get the whole dose down, so don't put it in so much water that you don't get it finished.

Fire on the Mountain Tonic # Two

Ingredients


2 64 oz. bottles of organic apple cider vinegar with mother,
(Braggs make a very good one, but it is expensive. I have found a very acceptable option at Sam's, Nature's Intent organic apple cider vinegar with mother. It is much more affordable and I can't taste a difference. The important part is that it is organic, raw and has "mother" in it, which is a collection of living organisms composed of a form of cellulose and acetic acid bacteria that develops on fermenting alcoholic liquids, which turns alcohol into acetic acid with the help of oxygen from the air).

2 cups of habanero peppers, split, (for those who are able to take the heat)or 3 cups of jalapenos, cut into 1/4" rings. If using jalapenos, then omit the next ingredient in the list, they are added to this amount for a total of the required peppers.
1 cup fresh jalapeno, cut into 1/4" rings
6 whole bulbs of garlic, cut in half through the equator,reserve two halves to be kept intact break apart the rest and bruise/mash with the flat edge of a knife. (No need to peel the cloves)
12 inches of fresh horseradish root, Scrub with a brush but do not peel, cut into 1/2" cubes 
1 large hand of fresh ginger, or enough ginger root to equal 2 cups sliced ginger, washed and sliced into 1/4" thick slices. Do not peel.
1 1/2-2 cups sliced turmeric root, (12-15 or so rhizomes of fresh turmeric)
1/4 cup black peppercorns, bruised and cracked in a mortar and pestle or given a quick whirl in a bullet blender, you don't want it powdered just bruised and cracked.
1 large onion, root end and tip end cut off, loose skin removed, (leave the rest of the skin on), then cut into thin slices
2- 6" sprigs of rosemary
4 1/4" slices of lemon,(wash lemon well before slicing)
1/4 tsp. salt


Equipment

Apron
Sharp knife
Mandolin with slicing blade, optional but makes things more uniform and goes faster
2 half gallon Mason jars

2  4 oz. mason jar
2 Plastic wide mouth Mason jar lid (can be found at Walmart in the canning section, or purchased on Amazon,com), or a piece of plastic wrap and a two part metal Mason jar lid, ( *Due the fact that metal that is not stainless steel can taint the fermentation process, it is necessary to use a plastic lid or put a piece of plastic wrap between the rim of the jar and the two part wide mouth mason jar lid.)
Nitrile or latex gloves
9x13" pyrex dish or comparable sized plastic container with 1 inch sides
Strainer
16x16" square cheesecloth
Funnel
12x16" or larger piece of cheese cloth
1/2 gallon mason Jar or glass bottle with tight fitting lid that will hold the final volume of liquidWipeable, impermeable tablecloth

Instructions

Cover your work surface with wipeable tablecloth. Why? Well, the turmeric root will stain whatever it touches and it will not come out. Don the apron and make sure to put on your nitrile/latex gloves. If you have sensitive skin, double glove your hands. 

Sterilize all jars by pouring boiling water to the brim and leave sitting until cool enough to handle. Pour off water and dry jar with a fresh, clean towel. 

Place all ingredients except for the lemon slices in a blender in batches and blend with just enough vinegar to get things moving in the blender. Divide the blended ingredients equally between the two 1/2 gallon Mason jars and drop 2 lemon slices in each jar. Fill to the top with the apple cider vinegar.


 Cover tightly with the plastic lids or with a piece of plastic wrap and the two part mason jar lids. Place in a tray or on a plate so that anything that might leak out drips on the tray and not your counter top. Place in a quiet part of your counter top where you will see it and remember to invert the jars twice a day for a week and then once a day for 4-6 weeks. 

When ready, extract the tonic using the technique in the recipe above. Decant into storage container, just make sure that the tonic will fill the container leaving as little airspace as possible, to prevent any oxidization. This tonic is shelf stable and does not need to be refrigerated, although it does go down better if it is cold. Since this tonic takes awhile to make, (6 weeks), and will last indefinitely. It is a good idea to double or triple the recipe, to make sure you have plenty on hand and don't have to make it very often.


To use: 

Measure 1 - 1 1/2 ozs. in a shot glass,(a good place to start, but eventually you want to be up to 2 oz. per dose), and drink in 6 oz. of water, add a little honey if necessary to get it down, (or do what I do and just throw it back it one mouthful and swallow...not recommended for the uninitiated or faint of heart...), and oh yeah... best taken on a full stomach.... This tonic will cure what ails you and will keep your immune system strong so that you don't catch every bug that is floating around out there. How does the old saying go...? "What doesn't kill you will make you stronger..." Really, I am not trying to scare you off... this stuff is great for your immune system and will strengthen you,  protect and heal you from so many ailments it is worth the effort to make it and acquire a tolerance to it's fiery nature, but  you will need to take it slow and build up to the recommended dose. Drink it mixed with as much water as necessary to make it comfortable for you, but you want to get the whole dose down, so don't put it in so much water that you don't get it finished.

A note or two, A recipe and some serving ideas:

Virgin Mary
3 stalks celery including the leaves, plus extra for serving
several dashes Worchestershire sauce, * vegans be aware Worchestershire has anchovies in it!! There are brands of vegan Worchestershire that can be purchased your local natural food/gourmet store.
1/8 tsp. or less to taste, celery seed
2 limes, juiced
48 oz. good quality tomato juice
Blend together all ingredients and store in a closed container in the fridge. For each beverage to be made, measure out 6-8 oz. of Virgin Mary blend and add 1 1/2 - 2 oz. shot of Fire on the Mountain Tonic. Stir well and enjoy with a celery stick swizzle stick.  If you have had a particularly hard day, throw in a shot of good quality vodka, and have a Bloody Mary instead, relax and enjoy the burn!

Just a few other ways to get your tonic dose in...(besides just gripping the counter and throwing it down... wheezing and gasping until the burn stops... (just kidding... kinda...).

Mix a shot of tonic in with an individual serving of salsa and eat with chips.
Add to salad dressing for a taco salad, or top your tacos with a blend of tonic and salsa
Add to a rice dish once it is not piping hot from the pot. 
Add to non-mayonnaise based cole slaw or cucumber salad

*Note#1- Since the whole idea behind this tonic is to consume the raw, living, fresh juice of the vegetables full of vitamins an enzymes, cooking with the tonic would defeat the purpose, so if you are adding this tonic to a food preparation, make sure the tonic is not cooked.
**Note #2- While there is an initial burn when consuming the tonic, at first their may also be a burn on the way out... uh... how do I say this delicately... have you every hear of Mexican Heart Burn?? Anyway, the burn that you may experience initially when going #2 will stop once your body is used to the tonic.

January 9, 2016

To Everything There is a Season...The Rhythms of Prepping, Part 1

Part One of a Three Part Series

For us prepping is a way of life. It has it's rhythms, seasons and time demands, all of which dictate how we live the rest of our lives. Really, I don't like the word Prepper as a description of what we do... we are not particularly preparing for an apocalypse, for societal meltdown or a global plague, what we are preparing for, is for life to happen. That could easily be a SHTF situation or it could be a personal health or financial hiccup. In what ever circumstance we find ourselves, we want as much of life as possible to be under our control; to be self-sufficient in as many areas of life as possible.

In the past, what we now call "Prepping", would have been the rule instead of the exception.  People of my grandparents generation and all the generations before, knew that if they didn't take care of themselves, no one else was going to. They survived and thrived by doing for themselves, working with their hands, learning skills, growing food, creating solutions, and being satisfied with what they had or making do when no other resources were available. It has only been in the last few generations that we have become disconnected from the basic rhythms of life. Now as a society we teeter on the edge of collapse. Not because of all the threats, like terrorism, that lurk waiting for their moment to arrive or because of political machinations, or government ineptitude, but because as a society we don't have the knowledge or skills to survive if the very fragile and vulnerable infrastructure we live in should stop functioning.

Years ago, when we were first married, my husband and I started to see societal disconnect from the values, practices, and knowledge of past generations. Opting instead for the convenient, the quick and the easy. Fearing that the experience and knowledge of the past would pass out of existence, and thus not be available for us to draw on, we started methodically to learn all that we could about as many self sufficiency subjects as possible. That has been going on for our 38 years together. We have amassed by study, practice and experience, many skills that we rely on daily. In our opinion, learning never stops, so we just keep adding to our collective pool of skills as we go along. I delight in learning new things, it is food for my soul, but I try to make sure in the present state of things, that what I put my time and brain power into also has a practical application.

 For Preppers, knowledge is life. So our preparations include the acquisition of as much knowledge as possible, whether it is in our heads, or in a book that we have in our possession. Much knowledge comes from experience, but a vast quantity of information is presently available in books, Amazon.com has a huge selection of books, both new and used, on just about any subject imaginable. The used books are often very affordable, and a cheap book in used condition still holds the same info as a new one at 10x the price. Then of course there is the internet. Practically anything you could ever want to know is on the web, either in written form or on video, and is free for the taking. I often spend quiet moments in the evenings watching how-to videos or searching and printing information that I may need in the future, this lets me collect pieces of knowledge for digesting later.

I believe an important skill for a Prepper to have is to understand nature's signs and cycles, and to be able to correctly identify what needs to be done when. This means you don't miss an opportunity when it's moment has come. To give a few examples, by knowing your area's planting zone and first frost date you will know when to plant and when to make sure you have your harvest in. By knowing your forage seasons you will know what wild foods are available in what season and when to pick your medicinal plants. Knowing what time of year is the best time to cut trees for next years wood supply will save you drying time for the newly cut wood... by knowing when the nut crops are ready for harvest and being able to identify and locate the trees, you will be able to collect the nuts before the squirrels get them all. When do edible mushrooms appear in the woodlands or when can you tap sap for syrup? What is the best time of day to fish? What time of day do you harvest herbs for cooking or medicine? How can you tell when a frost is coming or when there will be rain without a weather forecast? What does the sky look like right before a tornado? What signals do animals gives us about inclement weather? Being well informed about natural rhythms and indications, will leave us less vulnerable should we suddenly not have our regular sources of information available.

Working within the framework of natural rhythms, we have developed a calendar of activities that we follow year after year. Our garden calendar runs like this... I plant early spring seedlings under lights in late November, mull over seed catalogs and tend early winter gardens in December. We order seeds for the year and plant out early spring crops in late December/ early January. Do ground work, establish new beds, weed and compost unplanted beds and start late spring seeds from mid January through February.
Seedlings started in mid-November are almost ready to be set out before Christmas 
Weeding and composting on a nice day In January

We are harvesting early cold weather crops and filling harvested beds with late spring seedlings in March, as well as planting out hardy perennials flowers and herbs. April is a blur of harvesting, planting, fermenting and dehydrating. Even though April 15 is our last frost date, I never plant out warm weather crops before the first of May when the ground is consistently 70 degrees. Also, the area where we live is notorious for a surprise frost the last week of April, so I am patient and wait until May to put out my pepper and tomatoes. I am never sorry that I waited. May is the best month of the year in my opinion, the planting is done for awhile, the azaleas and roses are at their prime, birds are singing, the sun is warm but not hot... so May is my month to take it all in, have a garden party or just lay in the grass and watch the activity around me.
New Dawn rose in all her May glory
The New Dawn roses's sweet pale pink blossoms 
Part of the Azalea Garden
We have over 200 azalea bushes... there is no way to get them all in one photo!

 June begins a whole new flourish of activity, weeding, watering, succession planting, harvesting and putting up late spring garden goodies. June is also strawberry picking time, so I spend a lot of time hanging upside down in our strawberry beds, itching... (I am allergic to the strawberry leaves).
Sweet Charlie June Bearing Strawberries from our strawberry patch

Mm-m-m Breakfast !

We also usually try to make a trip to the Fancy Gap area of Virginia in June, to pick cherries at Levering's for the freezer. July is the month to water, water, water, since we won't have much rain from June until late August. The blackberries will come on first and then blueberries. Because I will find myself picking buckets of berries from late afternoon until dark, I will need to plan for something easy to fix for dinners in July, something say, that includes blackberries and blueberries? One summer a few years ago, we picked 55 lbs. from 2 blueberry bushes... we have 15 blueberry bushes and 2, 40 foot rows of blackberries so that is a lot of picking!
Two 40 foot rows of heirloom variety Blackberries keep us in berries in July

These gigantic berries are a very old variety, sweet and juicy. We saved a few brambles from our favorite picking spot when an old homeplace where they were growing was turned into a subdivision. We started out with 3 sprigs and now we have 80 feet of trellised blackberries


Blueberries on one of 15 bushes coming ripe. Soon there will be more berries than we can pick!


But July is also the month of beans an squash, so there is blanching, freezing and dehydrating going on. August has bumper crops of tomatoes and okra. We dehydrate almost all of our produce rather than can them, so the dehydrator is running 24-7. I take cutting from the tomato plants to root for a succession crop of tomatoes that will bear until frost. I will be starting seedlings for an early fall garden in early August.
54 tomato plants will provide us with fresh produce for our summer table and lots of tomatoes for making salsa and dehydrating


Weighing and dehydrating Roma tomatoes for winter use. We weigh all the produce that comes out of the garden and keep records of food production.
September is when the weather cools off enough that the peppers really start producing. They have been in the ground since May, getting bushy and tall, but the blossoms all fall off in the intense heat of July and early August, so when the weather cools off some and the fruit sets I begin to have peppers to eat fresh and put up. We dehydrate bell peppers and smoke jalapenos and habaneros, some will be dried and the rest made into Habanero Mango salsa and Chipotle en Adobo, canned and put up in the pantry to warm up our winter table.
A mix of ripe Jalapenos for chipotle, and habanerso for salsa
Smoking jalapenos is pungent work... Whew! 


September, October and November, we harvest, put up and replant for a late fall garden. Our first frost date is 15 November, so by then I will have harvested most of the warm weather crops, leaving the peppers until the last minute to get the most out of the harvest. I garden barefoot, so when I feel a certain chill coming up from the ground and see a clear, crisp evening sky, that is a sure sign of frost, so my husband and I run out with a basket and a flash light to harvest the last of the peppers. During November, we will also erect our winter garden hoops to shelter some of the cool weather crops, like lettuces and other salad greens from a hard freeze. We will have kale, chard, lettuces, beets,and other root crops, cabbages and broccoli as well as oriental veggies and greens growing all winter.

Hoops are up just waiting for plastic
Below freezing temperatures and several inches of snow outside
A toasty 50 degrees inside!

 December will start the cycle over again.  We rely heavily on our gardens and grow 365 days a year , thus securing food for our table now and for the future, should hard times arrive. So there is seed starting, seedling care, soil maintenance, transplanting, feeding, watering, weeding, harvesting and putting the food to use, fresh or preserved going on all year. There are always tasks to be done and schedules to keep in order to manage a year round food production system, so a certain portion of every day is spent on gardening tasks. But the garden seasons aren't the only cycles we work with... there is much more to life and to prepping than that!

I will continue to discuss other rhythms and calendars of prepping in Part Two and Part Three of this series. If you have any questions or would like to comment, please do! I love having a good chat and constructive feedback is always welcome! See you in Part Two!


October 22, 2015

The Most Neglected Part of Prepping

As I was pondering our present circumstances, (personal SHTFsituation), and looking ahead to the foreseeable future, I realized something that I had forgotten from our last SHTF fiasco. It is very easy to get so entrenched in the high adrenalin, fight or flight mode, that when things begin to settle down, it is hard to get out of that mode. It becomes almost addictive. It begins to feel like things aren't right, if something isn't going wrong...

We are still in a total mess, nothing is in its proper place, there is sawdust coating every surface, even though most surfaces were tarped or covered with plastic, saw dust is insidious, it found its way under or through the coverings. We have to cook and eat our meals outside. But thank God we are able to sleep in the house now that the weather is cooling off. I realized yesterday that even though we are living in a "disaster area", we are on our way up, the bottom has been found and we are making progress... so why do I feel so depressed and exhausted? Adrenaline fatigue...

 We have been working on the house non stop, day and night for more than a month, as well as living outside for most of that, without a break or an end in sight. I am tired, out of sorts and I have lost perspective.
Cabinets in this part of the kitchen are taped and ready for sanding. The floor has been replaced, and the stove is in place but won't be hooked up until the kitchen cabinets are done since gas stove and construction don't mix.
Everything is covered and inaccessible until we are finished sanding and painting.

So last night I decided to make a margarita, (made by flashlight in our outdoor kitchen :D ), and began to work on the art for our newly sanded kitchen cabinets. I got lost in the project and worked really late, but I felt like a new person this morning.

What does all this have to do with prepping??? A lot. As Preppers, we spend a large portion of our financial resources, time and effort on making sure we have the essentials, which is appropriate, but it is important to think about our mental health as well. Unfortunately, this area of prepping is seldom considered, or planned for. Whatever scenario you find yourself in, there will come a time when things need to normalize, and "life" to go on. The whole point in surviving is to make it through to a point where LIFE can begin again. But if "the plan" does not consider how to begin to have a life again, and to provide for it, then eventually everyone will burn out.

In all but the most dire of situations, there should be some down time factored in for each person, some time to recharge the mental and physical batteries. What preps have been done for that? Are there any unread books, paper, pens, crayons, paints, non electric wood working tools, or whatever supplies you need to feed the inner child? Have the needs of the adults been considered as well as for the children? And what about those surly teens, who only get more surly when under stress, what preps have been made for them to blow off steam?

You have extra batteries for necessary equipment, but how about for the hand held game devise everyone will be missing? Are there decks of cards and travel size games in your preps, what about a frisbee or a ball? Do you have an artistic person in your group? Have good drawing pencils and notebooks of blank paper, a tin of water paints and some brushes for them. A book worm in your midst? Have some good unread books for them and have them read out loud to provide everyone with some entertainment, A putterer, builder, mechanic? Have non electric tools, wood and other supplies at you long term locale, and a few magazines stowed away for a rainy day or bug out. Crayons and colored pencils, and some children's and adult type coloring books can be a real pick me up for everyone. Yarn, crochet hooks and knitting needles can make socks, and other needed apparel, but will also have some de-stressing value. It is very easy to put all these things in on 5 gallon bucket and store it away until needed. These should be updated and rotated as time passes and ages and interests change.

A compact digital camera and extra chips to document the experience for posterity, will prove invaluable. You may not be able to view them immediately, but some day there will probably be access to modern devices again. Do you really want to miss the opportunity to document your life and challenges for the future? What if not everyone makes it through... having a camera and taking photos may give you one last look at a loved on or friend. Morose I know but give it some thought.
A camera is definitely part of my long term storage plan.

Although I have many interests and a lot of them I would need to put into practice in a practical way during SHTF, like non-electric cooking and baking, gardening, sewing, herbal medicine, etc., but I try to keep the supplies in stock and rotated for some of my less practical interests, strictly for escapism/ mental health time. For me, if I have a clean dry surface and some paints, I can escape into a world all my own. And just for fun, here are a few pics of what I did during my margarita/ mental health time.
Top section of one of the pantry cabinet doors. I am going with a botanical theme for the paintings on my cabinet doors. This one is dill. There will also be mint, oregano, and lavender on the three other doors. Then a smaller less elaborate motif on each of the other 14 cabinet doors.
Close up of part of the bottom of the same door.

Detail of the butterfly on the bottom section of the same door.

What makes your heart sing and what plans have you made for your mental health time in your prepping? Please feel free to leave a comment and tell me about you de-stressing plans.

October 2, 2015

Things I Have Learned While Living in My Garden

For those of you who don't know the whole story go to this post on my other blog to get up to speed. In short we were driven out of our house into life in our garden by mold caused by undetected water damage in our kitchen. We are now in our 4th week outside and I have learned many things. Having been through this kind or situation in the past, (Hurricane Hugo 1989 was a 6 year ordeal for us), we have made prepping a part of our every day life. It is a very good thing we are accustomed to roughing it, and even as prepared as we are, there are some things I see we need to address more thoroughly.

Plan A
 When we started this whole adventure I implemented Plan A: quickly set up an outdoor kitchen. I had to prepare food for our Sabbath and for a friend who had lost a family member. The outdoor kitchen was set up in no time so I could take care of the food requirements for a couple of days. Fortunately I had set up our kitchen fly over the outdoor kitchen, so when a pop up thunderstorm and torrential rains blew through I was under cover. Well kind of... water ran over my feet while I was cooking. Since the spot I chose was level at the 4 corners but had a slight depression in the ground in the middle, so it was a perfect place for rain run off to go. Also the wind blew the rain in through the screened Kitchen fly and threatened to dilute my soup.

When my husband came home that evening we went on to Plan B. We moved everything to the
Plan B
deck way above the ground which gave us good drainage and some shelter from wind driven rain. We also set up our tent on my yoga platform so it would be up off the ground and hopefully dry. So life went on as usual, there was no more rain for the better part of a week. The sun was shining and the northern exposure of our deck gave us shade from the heat of the day. I enjoyed preparing meals and doing some food preservation while watching the butterflies flit from flower to flower just beyond the deck rail. Our Corinthian Bells caught the breeze and called out resonantly from the vegetable garden. Ah... life was good.


We had company come to visit and help us celebrate Yom Teruah, It was a lovely evening. I had prepared a number of tasty things to eat and we watched for the new moon and then ate on the veranda in the warm evening air. It was such pleasant evening, Da and I both settled into the tent on our inflatable mattress feeling very satisfied with our well executed contingencies. The "honeymoon" phase lasted for almost another week and by then we felt like we had a pretty good handle on things, and would be fine for the duration. Ha! Just when you think you have it all figured out...

It started raining, which was no real biggie at first. We were up off the ground and I pulled the tables in some so that the mist from the screened kitchen fly didn't affect my work. I was running the smoker in the yard smoking first, marinated portabello mushrooms, and then a couple of batches of habanero, seranno, and jalapeno chiles. The back yard smelled wonderful and my pot of habanero peach salsa was smelling pretty good too. But as the day progressed, the rains got harder and the wind picked up, all of my food prep area was soaked and the wind kept blowing out the flame on my propane camp stove. I had to stop working and put everything under cover until the rain passed, which took 3 days... I refrigerated the salsa to be canned up another day, and just did the bare minimum necessary to put something hot on the table. That night we went to bed dry and snug, but sometime during the night the bottom of the tent started to take on water. In the morning we were surrounded by a moat. The goose down comforter and sheets were wet and had to be dried out by draping them over furniture in the house. The canopy over the outdoor kitchen on the deck had given way to water and everything inside was soaked. It was of course still raining.

Plan C
So-o... on to Plan C, move everything from the outdoor kitchen on the deck, (including emptying and moving our fridge and having to get it down off the deck in the pouring rain), and relocating it to the covered veranda, where we had been taking our meals and hanging out until bedtime. Then we moved into our 1957 camper, which is great and I love being in it, but we haven't renovated it yet so it has a few quirks... actually more than a few, but it is under a cover and dry so it will serve.

Now we are into our 4th week outside. It looks like we may have the mold issues under control soon, I hope... But for now, Hurricane Joaquin is threatening to dump upwards of 11 inches of rain on this area and the weather has turned cold. Fortunately, I have lots of food made up so my time outside cooking will be in short stints, just to warm things up. But we will be pretty much trapped at the little table in our 13 foot camper, until the storms pass on Monday. Hopefully we will not have to resort to Plan D, which involves packing up and moving to a hotel until it stops raining. I despise hotels and we have a kitten that is really not self sufficient enough to stay on her own that long. So it would be much better to stay here where we can keep an eye on our property and critters. We shall see... Last night the winds brought down a large limb which struck the corner of the pergola cover where we keep our camper and scared the ba-geezes out of me... it sounded like the whole tree came down on top of us. No damage done, but I did get a wake up call to move my car to the other drive where there are no trees!

Here are some things I have learned from this adventure:


1) I really do like living outside, I may place our plan for a covered outdoor kitchen further up on the priority list.

2) Rain changes everything. What is tolerable, maybe even fun when dry, becomes far more difficult and depressing when everything you own is soggy and there is little escape from all the wet. Rain makes even simple tasks difficult. It ruins things. My towels all mildewed, the totes containing my staples and seasonings somehow took on water, the labels came off, things in jars caked up due to the saturated conditions, the staples turned to mush. My feet have been soggy for so long I am staring to worry about jungle rot, (not literally, but foot care is very important when living outside in the wet). Cooking in the wet sucks, sleeping wet sucks more.

3) Outside is dirty. I am constantly wiping down surfaces and having to wash dishes, pots and pans before and after use. Which is no picnic when you don't have a sink and are standing outside with a pan of water, in the pouring rain, with mud squishing under foot, trying to get the dishes clean enough to be safe to eat from. Clothes get dirty quickly, hands and nails get really dirty. No amount of foot wiping will keep you from dragging leaves and dirt into bed with you.

4) Insects are a pain, both literally and figuratively. My biggest fear in living outdoors is my bee allergy. I had hornets buzzing my head because they were trapped in the kitchen fly and couldn't find a way out. Trying to help them out was, literally, taking my life in my hands... Swatting hornets just makes them mad, they are not forgiving and like elephants, they never forget... if you offend one they will wait for you and come after you when you least expect it. Yellow jackets wanted my fruit and to drown themselves in my beverages or disappear down my straws, (swallowing a yellow jacket that was in your drink is not recommended, I didn't actually do that but have witnessed what happens when one does...), ants invaded everything that wasn't sealed in a jar or tote. I spent at least 1/2 hour of every day getting butterflies out of my kitchen tent... I know... you're going to complain about butterflies in your kitchen?? Well after awhile them beating themselves against the screened walls and flapping in you face and on your head does begin to wear on one's temperament. I have been bitten by ants, threatened by hornets and flogged by winged creature enough in the last 4 weeks to last a lifetime.

5) Personal hygiene requires a lot more work, teeth brushing, potty breaks, bathing, keeping clothes clean enough to wear. Fortunately we have a bathroom that is a short distance from the back deck. It is isolated from the mold in the rest of the house. We have power and hot water, so we can still bathe inside and use the bathroom indoors, but now we are living in the camper instead of the back yard so it is a trek all the way around the house to the back door if I need to go to the bathroom in the middle of the night, in the pouring rain. Then I track mud and wet back to the camper and try not to get it in the bedding.

6) If you have a personal SHTF situation instead of a community SHTF, or Global SHTF, then the rest of the world goes happily along while you are trying to figure out where the hell you left the flashlight so you can find your way to relieve yourself, have to be work clean when you're living outside dirty, having to be on time when everything takes at least twice as long to do, and eventually when you have been at it long enough you just start to disconnect from the rest of the world. Surrounded by your reality, the rest of reality becomes decidedly unreal. People start to shake their heads at you and you have little patience for their condescension. You start becoming isolated, lose track of time, don't differentiate one day from the next, stop going out. You begin to think that this is life now and hunker down for the long haul.

7) My biggest discovery during this adventure has been that we actually have a lot of the big things under control. Equipment, supplies, skills, are all pretty much as good as we would hope for. Most of the new issues that we are running into are different than those we discovered during Hugo, (which went much later in the year so we were dealing with cold weather, had no power, no water, and had to rebuild our home while trying to survive with small children in the mix,). Most things have been of less consequence, and have to do with smaller details like bugs and everything being dirty all the time. But it is good to know how much those things can affect your ability to cope. I am glad that we have had this opportunity to test what we know and live out our plans in a time where, if all else fails, we could just go stay in a hotel. It is much better to work out the kinks now, instead of finding things out when there are so many big issues to consider and get a handle on, as would definitely be the case in a real crisis.

So, in closing, I will state that being prepped with food, water, defense and medical supplies is important, but you won't know what your most important issues and preps are without practice and experience. Turn off the power for a week. Live in the back yard, camp, cook, do laundry and practice your practical skills, while making note of things that need work, supplies you wish you had, issues that came up, and then fill in the holes and try it again, until you are certain that you have the basics of living under control. You won't be sorry you did.

September 10, 2015

Stocking an Emergency Pantry, Part 2 in a Series on Keeping a Prepper's Pantry

When talking to people about stocking an emergency pantry, people often say they don't know where to start or how to calculate what they will need for their family. That can be a daunting process if you look at it as the big picture.; What I suggest is to break things out into smaller, more easily-handled tasks. I think that the best place to start is to look at what you cook at home right now and write it down in a notebook that you have designated for this project. Mark down what you and your family eat, breakfast, lunch, dinner and snacks, remember to note condiments that you used and what beverages you had.. Also make note of how often you eat out and what you eat when you do go out for a meal. Save your shopping lists and your cash register receipts, put them in an envelope that you have taped to the back inside cover of your notebook. Keep diligent notes for a month. This information will be used to help you make a plan for beginning your emergency pantry. For the present you will be focusing on building up your every day food supplies, we will call this your "Three Month Pantry". The goal for this pantry is to provide your family with foods that can be used daily, rotated and restocked frequently. But that will ultimately have a three month stockpile of foods available in the event of a short term emergency situation.

During the month that you are collecting data about what you eat, you can begin to look around for an area that you can designate to hold you pantry supplies. I know that this may actually be the hardest part of the process... Many people live in apartments with little storage, or in homes, but are up to the gills in stuff and have no where to put anything. This might be a good time to take stock of what you have and what you need, to de-clutter and pass along things you don't use or that are just taking up space. If you are an apartment dweller, does the apartment complex give you a storage locker or outdoor shed that you can store some of your possessions in to make room for your food stockpile inside the where it is climate controlled? Can you spare 6 inches of floor space and pull your couch out from the wall, so that you can store some supplies behind it? My son did this in his apartment. He made room behind the couch by pulling it out several inches,(6-8"), then used the area he made to hold some of his storage goods. He kept the end tables up against the wall to hide the gap,; I never even noticed that he had done so until he pointed it out. Consider under-used spaces like the top shelves in closets, how about that dead space at the back of a kitchen base cabinet that you have to be a contortionist to get into? Can you put your bed on risers and use the space under the beds? Do you have a closet you can retask by de-cluttering? How about a garage? Do you have a designated junk/storage room that you can organize and use part of ? At one point in our lives, we used some of our storage as furniture... instead of an end table we had a crate of stockpiled good that we topped with a piece of plywood and covered with a pretty table cloth and a lamp. No one ever noticed that it wasn't a table. The same thing could be done for a coffee table. We did away with our bed frame and used our 2 gallon long term storage buckets, covered by a dust ruffle to hold up our box spring and mattress... it worked fine and we never had to clean under the bed! How much space you can carve out will determine how much of a stockpile you can realistically put aside as a reserve.

I have already written a blog post on this subject, but I feel like more detail would be helpful, so I will elaborate and hope to not repeat myself. To read the first blog post on this subject, go here. For simplicity of illustration, lets suppose that you found adequate space for your emergency pantry goods, inside your living space, with easy access. Now it is time to take all the notes you have been compiling on your eating and shopping habits and turn them into a comprehensive list of your most often used food items. From the list of meals that you prepared during the month, write down the ingredients that you used for each of the recipes. Once you have done this for all the recipes, you should start to see some patterns emerge. Are there ingredients that were used in the majority of the recipes you prepared? Make a list of these items on a separate Item page, one food item per line. Each time an item appears in the recipe notes, make a mark next to it on the Item list. This Item List will tell you which foods you use the most. Look at your cash register receipts to see if there are repeat items on them, if there is a repeat item on the receipts that is not on your Item List, add it to the list. What you want to end up with is a list of items that you can use as a shopping list to begin your emergency pantry.

At this point you will be able to see what foods your family most commonly eats. These foods, coupled with some staple items like sweeteners, salt, oil or shortening, flour and seasonings, will be the base that you will build your pantry stock on. Now you are ready to start adding these items to your regular shopping list. Start with the foods on the Item List that are used the most. If there is an item on your regular shopping list that is also on your item list, then put a star next to it on your shopping list and purchase two of those items instead of one. In the case of fresh meats or produce, purchase your fresh items for immediate use and a shelf stable version of the same item for you stockpile. For example, if you have meat on your menu frequently, then buy whatever meat you will use for your meals this week and then add at least on can of some kind of shelf stable meat, poultry or fish to your stockpile. It may not be fiscally possible, every time you shop, to get doubles of all the things that match on your grocery shopping list and the Item List. So on each trip try to add at least a few things to your pantry stock, starting with the things that are used the most and moving down the list from there. This is a great time to plan your weekly menus by watching for sales, and clipping coupons for items that you regularly buy, to keep the costs of stocking up to a minimum.

In order to make sure that you are covering all the important bases, here is a list of items that would be important to have in an emergency. Shelf stable milk, either aseptic boxes, evaporated canned milk, or dried milk powder, shelf stable fats, like coconut oil , ghee, canned shortening, and to a lesser degree olive oil or vegetable oil. These fats need to be rotated out of stockpile and into the kitchen regularly, since they can go rancid. When you use your kitchen supply of oil up, then shop from your pantry stockpile to replace kitchen stock and replace the emergency supply on your regular grocery trip. Shelf stable meats, poultry and fish, need to be in your pantry stock, to take the place of fresh meats, etc. if there is no way to get to a store. Sweeteners, flour, grains, canned vegetables, canned soups and stocks, pasta, rice, and spices and seasonings, can help to round out a menu should you have to depend on your emergency pantry to put meals on the table. I don't stock any beverages except bottled water in my emergency pantry. Since water is very important to health, especially in stressful situations I don't want to have less healthful choices available. Also fruit juices and bottled drinks don't have a long shelf life so I don't spend money on them.

These are the beginning steps to establishing an emergency pantry. There is still much left to do, but if you start by buying shelf stable versions of the foods that you eat the most, then you will be well on your way to having a stockpile of food that you can depend on in an emergency.

In future posts on stocking an emergency pantry, I will discuss Beginning a long Term Pantry. Until next time!


Variety is the Spice of Prepping

The other day I went to one of my Prepper haunts in Charlotte, no not a gun shop, or even REI, but the Indian market across highway 51 from Carolina Place. It is called Patell Brothers. It is a great place to find a much broader variety of dried beans, lentils and grains, as well as having organic whole spices for long term storage, and premade, mylar packaged Indian meals. These are healthy,tasty, and the bag can be thrown in a pot of hot water to heat then you can eat right out of the bag, (my husband uses these on backpacking trips and swears by them). Their prices are quite good too so the prepping dollar goes farther.

Patell's is only one of many ethnic grocers I depend on for my long term food storage supplies. As a whole, ethnic grocers have an interesting variety of foods not commonly found at the grocery store, their prices are usually better than mainstream grocers and it gives you an opportunity to think out of the box. I also visit a Greek restaurant supply store for bulk dried garbanzos, cans of the best olive oil I have ever had, grape leaves, capers and oil cured calamata olives, an Asian market where I can get a variety seaweeds. nori, spring roll wrappers, pho noodles, rice wine vinegar, canned coconut milk, a variety of condiments and spices for my 3 month pantry, and their fresh vegetable section rivals the best main stream grocer in variety, quality and price, with the added plus of 10 different types of fresh, yes, fresh mushrooms! Then there is the Lebanese market that is home to my favorite Mediterranean spice blend, Zaatar. A blend of roasted thyme, sumac and sesame seeds that is to die for on top of hummus or sprinkled on olive oil brushed pita bread and broiled...yum... as well as Garam Masala, and other spices I use for variety when depending on basic staples. The Korean shop has a particular red pepper flake that I use when making Oi Sabagi, a fermented food I eat practically every day. The list could go on for awhile but I think you get my drift...

When depending on a few basic staples for an extended period of time it is advisable to have a way to add some variety. For us, these foods are incorporated into our daily diet, in part because I love ethnic foods and partly because we are vegan and these foods help to add interest to our table, but more importantly so that we are familiar with how to use them if we need to depend on them. Even if you are normally a meat and potatoes person, it is a good idea to have something in your bag of tricks to use when there is no meat in sight and rice and beans is getting old.

Here is what I bought this trip and how I plan to use them: Masoor Malka, is a kind of split red lentil. it cooks very quickly so it can be soup, salad or side dish protein in short order. Moong beans, better known as mung beans, can be sprouted for a nutritional punch when added to garden grown or foraged greens, or soaked and cooked up to make a dish similar to split pea soup. I usually sprout them since they are a veritable nutrient factory in sprouted form. Masoor Malki, the whole form of Mosoor Malka, make very tasty sprouts that don't taste as starchy as the larger lentils do when sprouted and eaten raw. Whole Urad, otherwise known as Black Gram, make good sprouts. The split version known as Urad Dal, along with cooked rice, are used to make a fermented batter for griddle cakes and dosas, a gluten free, absolutely delicious alternative to pancakes. griddle cakes also make a great vehicle for any type of foods you want to scoop up with your fingers, dips, thick soups and stews, or filled with seasoned veggies and potatoes and rolled up burrito style. They are delicious hot or cold. Toor Dal, or small dried pigeon peas, make a delicious soup. The recipe for this soup is on my other blog www.aviewfromthecottage.blogspot.com. Here is the link directly to the blog post. Just scroll down until you see Sambar soup. By the way this post has a really good recipe for soup stock that is great canned or frozen.

On this trip I also purchased candy coated fennel, which is great for that full feeling after eating a big meal, or for indigestion or upset tummy. It is more effective than Tums and doesn't have all the chemicals, (although it does have sugar...). I will put a bag of this in each variety bucket I make up and one in each medical supply bucket I put together.

I purchased whole organic spices, (Patell's price on organic spices is the best I have found anywhere), for long term storage. I will put each spice in a small mylar bag with an o2 absorber and seal it up. These will go in the variety buckets with the Indian foods, so that the spices required for the foods that I make will be with the staples used to make them. I also enclose a few of my tried and true recipes, in case something happens to me, (or my memory :) so that my family will still know how to prepare the dishes. And just as an FYI, you can buy pure sunflower seed oil from the Indian market, for about 1/3 of the cost of the grocery store price, (normally only found at high end gourmet markets and whole food stores not on the main stream grocery store shelves.)

I also bought a copper bottomed, stainless steel wok, with handles and a chapati rolling pin that makes perfectly formed chapati or tortillas. These will go in our emergency/camping cooking equipment. The wok was very affordable, $14.00 and will work as a pot for every occasion, that can be placed on a cook stove or on a rack over coals. The copper bottom will ensure even heat distribution to help control scorching on unpredictable heat sources.

In the future I will be posting more on how to add variety to your basic food storage. I will also post some of my favorite recipes for you to try out. The only thing I ask is that you credit me and my blogs if you pin or repost my recipes.

So for today I hope that you will think outside the box on what foods and seasonings to store in your emergency pantry. If you have any thoughts you would like to share on the subject, please, leave a comment. I would love to hear your ideas!

September 4, 2015

Lunch from a Prepper's Pantry

  It occurred to me today as I was making lunch for my husband and I that our lunch was a good base for a blog post. It is my way of thinking that being "prepared" is not just for an event that may or may not happen in the future, but to be prepared to put food on the table and live out my chosen style of life every day.
  Here at Heart's Ease Cottage, we spend a large portion of our time and energy making our life as self sufficient, and safe from outside influences as possible. That of course starts with an eye to what a body must have to survive: water, food, protection from the elements, are a few in a long list of things we work to provide for ourselves. Today though I am going to talk about one of my husbands favorite subjects, lunch!
  Today our lunch consisted of a sandwich and some sauerkraut and 16 oz. of good well water.. So? What is so blog worthy about that? Well, the sandwich was made with bread that was baked from Bronze Chief wheat berries, raw sunflower seeds, pumpkin seeds, and millet from our long term storage supplies. The wheat was ground in a Whisper Mills grain mill, (but we have a Country Living hand cranked grain mill attached to our counter that can be used if there is no power), and is baked in our gas oven, or in a non electric scenario, in a Dutch oven outdoors. The ingredients of the sandwich were hummus, home made from garbanzo beans that I can from our long term storage supplies, and keep on hand in the 3 month pantry for daily use. There was also yummy fresh tomatoes, Swiss chard, bell peppers, pesto basil, home made bread and butter pickles that I put up last year, romaine lettuce and red onion slices. Everything but the romaine and the red onions came from the garden this morning. The sauerkraut was made from cabbages that I harvested from our garden late in the spring and made into a naturally fermented, raw sauerkraut. Since this is a raw kraut, it is kept in the fridge instead of being canned, but will keep for months on end in the fridge, (if we don't eat it all first...), or in the event of no electricity will last a week or so out on the counter. Raw fermented foods are vital to digestive tract health, providing your body much needed enzymes and good bacteria to keep your digestive system working properly. It is an important food that is often neglected in the American diet, as is evidenced by all the gastric/intestinal problems and overall ill health that Americans suffer with. So especially for crisis mode food preps, it is a key element to staying well and at our physical best.
 Today's lunch is just a simple example of the way we use our prepping efforts not only for the future, but for today.
  What are you doing today to be prepared? Leave a comment and let me know what you are up to! Have a great weekend!

,
Related Posts Plugin for WordPress, Blogger...